Salted caramel ice cream is one of my all-time favorites. I’ve tinkered with a lot of different recipes, and have finally found one that is both easy to make and packs a flavor punch.


Salted caramel ice cream is one of my all-time favorites. I’ve tinkered with a lot of different recipes, and have finally found one that is both easy to make and packs a flavor punch.
This summer-tastic cucumber lemonade is one of my new favorites for many reasons – the main being, it’s easy to make and my whole family LOVES it. [No, really, I had to use the all-caps because my children devoured the first batch in almost a single day. O_O] I have no doubt that your family will love it too!

Looking for the perfect summer burger? Look no further, honey! This burger is sweet, savory, packed with protein, and has tons of umami flavor.

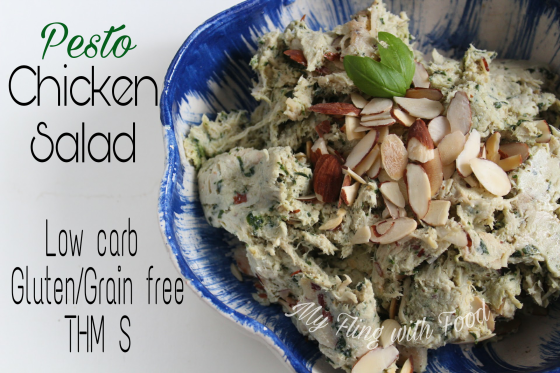
Wondering what to do with that beautiful, blooming (overflowing?) basil? Pesto is one of my favorite ways to preserve fresh basil. It uses a TON of fresh basil at once, and pesto can be used in a myriad of ways.

Is it just me, or does it seem like cold brew is EVERYWHERE this summer? Starbuck’s, Dunkin, and even the grocery stores are packing their shelves with different cold brew blends. Lucky for you, making cold brew coffee at home is as easy as picking up your regular grounds at the store!

Cold brew differs from your normal hot brewed coffee in a few ways. First, it’s the obvious hot steep vs cold steep. Second, cold brew is stronger than your everyday java so you only use a little at a time.

I suggest a strong, dark roast coffee for this because it adds more flavor and punch with less product.
Recently, I have fallen in love with Kicking Horse Coffee, and found that their “Kick Ass” blend is perfect for cold brew. It’s a bold, dark roast coffee that isn’t bitter. I like the whole beans, because once I get it I can grind
it to the coarseness I like and it tastes fresher.
To make your cold brew, just add 1 cup of ground coffee (as coarse or as fine as you like) to a quart mason jar, cover to the top with water, and stir. Place the lid on, and just let it sit in your fridge for at least 24 hours. For a more concentrated blend, you can go to 36 or even 48 hours.
Strain the grounds using a mesh strainer and/or paper filters
(to catch those extra small pieces).

Store in the fridge for up to 1 week (or as long as you can keep it around! ^_~).
As I said before, the best part is that you only need 1/4 – 1/3 cups of cold brew to make 8oz of coffee. If you enjoy your coffee black, just add some water to your cold brew. You can flavor it up with almond or coconut milk, extracts, etc.
I tell you, making cold brew at home is even easier than the drive-thru at Starbuck’s. Plus, you have more flavor options using your own coffee at home – win!
I started making this salad when my husband and I went vegan a few years ago, and all but forgot about it until recently. It’s a summer favorite because it can be enjoyed warm or cold, and it requires minimal cooking.

This salad is mostly raw/no-cook – the only component that requires cooking is the rice. You can use leftover brown rice, or you can cook it fresh. I prefer to cook the rice fresh, because I think the lime flavor soaks best into warm rice as opposed to chilled.
I start by chopping the peppers and onion, and placing it into the bottom of a large mixing bowl.
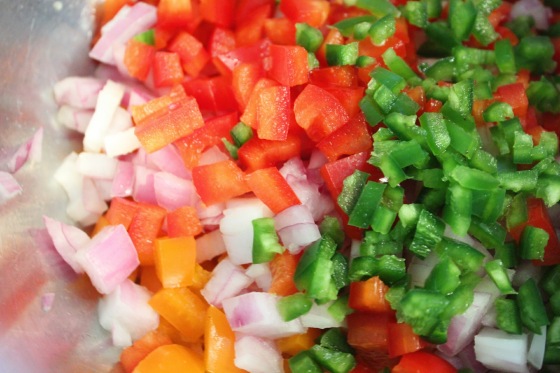
I use about 1/3 of a red onion, because I find the flavor to be strong after a while. If you dig raw red onion, you can definitely put more in there.
I enjoy colors, so I use half a red bell and half an orange bell with 1 small finely diced jalapeño (seeds and ribs removed). The jalapeño does not add a lot of heat – it’s very mild and my kids enjoyed this salad a number of times without being bothered by it.
Once your veggies are chopped, add them into your big bowl and sprinkle with salt and pepper.
Drain and rinse the kidney beans and black beans
while the rice cooks. If you enjoy other types of beans (like pinto beans
or white beans) you can sub those instead. It’s all about ease!
When the rice is cooked and cooled slightly (not piping hot, but not completely cool) add it right on top of the chopped veggies and squeeze the lime juice over the rice. The rice being warm helps it to absorb the lime flavor easily, and it slightly cooks the veggies. Give it a stir, then add the beans, a big handful of chopped fresh cilantro, and a little extra S&P.

And there you have it! A fresh, colorful salad packed with fiber and protein to go with any lean meat or fish.
I love this salad with some grilled chicken – shrimp, cod, or halibut would be fantastic mains as well.
This salad is fit for a big crowd, or as a make-ahead side to go with your E meals all week long.
Burgers are a staple in my household. Husband loves them. Kids love them. I love them! Plus, they are ridiculously easy to make.
This whole recipe (burgers plus a sauce topper) is less than 10 ingredients. Unbelievable, I know, but this recipe packs in the flavor with just a few ingredients.
I seasoned up 2lbs of ground beef sirloin with sliced scallions, salt-free all purpose seasoning, Worcestershire sauce
, and dry sherry.
It probably sounds weird to “season” burgers with wine before cooking, but trust me the flavor is *amazing*. The sherry adds a beautiful depth of flavor while keeping the burgers nice and moist. I cooked my burgers to a strong medium (warm, pink center) and there was no trace of raw alcohol.
Mix the burgers with your hands until just combined, score with the side of your hand into sections (for even patties – I got about 7 big burgers out of this), and form into patties.
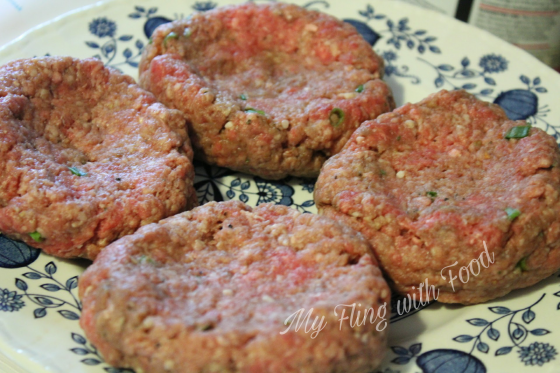
My best burger tip is to always make these slight dents in the center of your patties prior to cooking. The centers rise as they cook, so instead of them rising and you ending up with cylindrical burgers they rise to the height of the outsides, making it flat.
Before tossing your burgers onto the grill or sauté pan, season each one with a little extra salt and pepper on the outsides. This helps to ensure they’re seasoned well.
I cooked these burgers in a cast iron skillet for about 4-5 minutes on each side, turning only once.
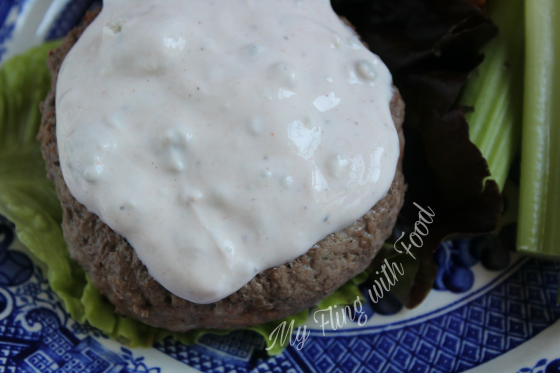
While the burgers are cooking, make the bleu cheese sauce.
Place the sour cream into a small bowl with the bleu cheese crumbles, a few dashes of hot sauce, salt and pepper, and a touch of half and half or heavy cream to slightly thin the sour cream.
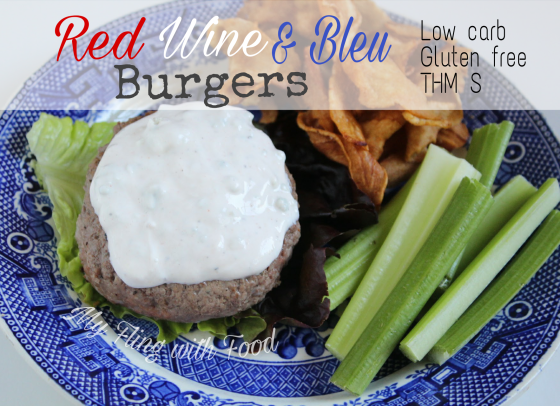
When the burgers are done, top each one with a generous helping of bleu cheese sauce. I served my burger alongside some fresh celery sticks and Trader Joe’s parsnip chips (which are seriously amazing, by the way. 1g of net carbs per serving and they’re a real chip!).
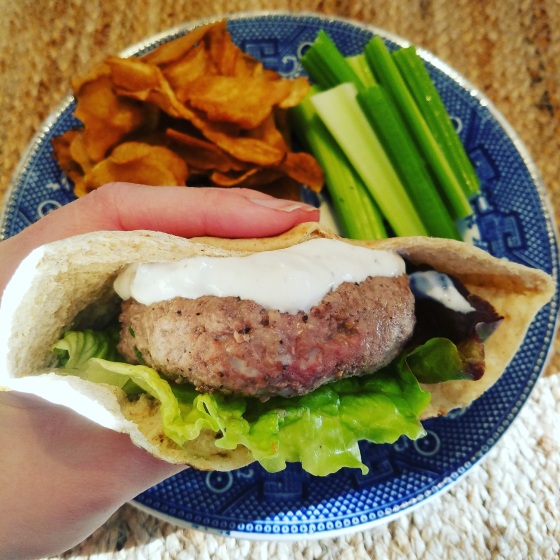
You can serve the burgers atop lettuce (red or green leaf would be a great choice), or stuff it into half a Joseph’s pita. Either way, it’s delicious!
The burger itself really is incredible – the sherry keeps it moist while adding a slight red wine flavor and the dry seasoning adds a punch of different herbal notes (citrus, parsley, rosemary, etc.) with a little hint of onion from the scallions.
The bleu cheese sauce makes it rich and a little tangy from the cheese. [Really, I think beef and bleu cheese were put on this Earth to be best buds because they certainly rock together.]
These burgers would be perfect for a holiday party! With a burger this good, your guests will be knocking down your door for the recipe.
Tzatziki is incredibly versatile. Use it as a topping for a burger, salad, or as a dip for meat and veggies. The good news is, it’s also easy to make.

Tzatziki is refreshing and takes just minutes to make.
I always used 0% fat plain Greek yogurt in my recipe, because you can use it with any THM meal.
For the cucumbers, I like to use hothouse cucumbers as they usually have less water than others. I lightly skin them, cut out the seeds, and finely dice.
Next, zest and juice the lemon. Add the parsley, dill, salt, and pepper and you’re done! Refrigerate for about 30 minutes prior to enjoying, so that the flavors have a chance to come together.

It is so creamy and delicious! The yogurt has a tang, while the lemon delivers a punch of freshness. The cucumbers are crunchy and refreshing. And the herbs tie it all together with brightness.
It’s perfect on salads, burgers, as an appetizer dipper, or as a sauce for meat and fish.

Shrimp and grits is one of my favorite summertime throw-together meals. It comes together quickly, uses simple ingredients, and has all the scrumptiousness of something that takes all day to cook.

For this meal, start with simmering the vegetable mixture. It takes a few minutes for the flavors to develop and reduce slightly.
Next, start crisping the bacon – trust me, you don’t want to skip it. That crispy bacon topping is EVER-Y-THANG.
Steam the cauli grits next.
And finish by sautéing the shrimp in the same pan where you cooked the bacon. The bacon drippings help get a nice, fried char on the shrimp.
Finish up the cauli grits, and you’re done!
Plate it by heaping a big pile of grits into a bowl, followed by the pepper and tomato mixture, then a few shrimp, and throw on some crispy bacon.

The grits provide a creamy pillow for the veggies, then the shrimp and bacon provide a crispy, slightly smoky bite.
I make this often during the summer months because it’s easy and kids and adults alike will gulp it down.