Refreshing Cucumber Lemonade (Sugar Free, THM FP)

This summer-tastic cucumber lemonade is one of my new favorites for many reasons – the main being, it’s easy to make and my whole family LOVES it. [No, really, I had to use the all-caps because my children devoured the first batch in almost a single day. O_O] I have no doubt that your family will love it too!

PicsArt_07-12-05.35.24.png

Continue reading

Teriyaki Chicken Burgers (THM E)

Looking for the perfect summer burger? Look no further, honey! This burger is sweet, savory, packed with protein, and has tons of umami flavor.

PicsArt_07-12-04.38.40

Continue reading

Southwestern Rice & Bean Salad (THM E)

I started making this salad when my husband and I went vegan a few years ago, and all but forgot about it until recently.  It’s a summer favorite because it can be enjoyed warm or cold, and it requires minimal cooking.

PicsArt_06-15-10.31.54.png

This salad is mostly raw/no-cook – the only component that requires cooking is the rice. You can use leftover brown rice, or you can cook it fresh. I prefer to cook the rice fresh, because I think the lime flavor soaks best into warm rice as opposed to chilled.

I start by chopping the peppers and onion, and placing it into the bottom of a large mixing bowl.

20170522023350_IMG_3306

I use about 1/3 of a red onion, because I find the flavor to be strong after a while. If you dig raw red onion, you can definitely put more in there.

I enjoy colors, so I use half a red bell and half an orange bell with 1 small finely diced jalapeño (seeds and ribs removed). The jalapeño  does not add a lot of heat – it’s very mild and my kids enjoyed this salad a number of times without being bothered by it.

Once your veggies are chopped, add them into your big bowl and sprinkle with salt and pepper.

Drain and rinse the kidney beans and black beans while the rice cooks. If you enjoy other types of beans (like pinto beans or white beans) you can sub those instead. It’s all about ease!

When the rice is cooked and cooled slightly (not piping hot, but not completely cool) add it right on top of the chopped veggies and squeeze the lime juice over the rice. The rice being warm helps it to absorb the lime flavor easily, and it slightly cooks the veggies. Give it a stir, then add the beans, a big handful  of chopped fresh cilantro, and a little extra S&P.

PicsArt_06-15-10.35.44

And there you have it! A fresh, colorful salad packed with fiber and protein to go with any lean meat or fish.

I love this salad with some grilled chicken – shrimp, cod, or halibut would be fantastic mains as well.

This salad is fit for a big crowd, or as a make-ahead side to go with your E meals all week long.

This post contains affiliate links, which means I receive a commission off of purchases made using these links. If you’re interested in fitness, the Trim Healthy Mama lifestyle, or just living a more healthy life, please consider using one or more of the links below. The money made helps me feed my growing family and keeps this blog running with free recipes. Thank you!

Southwestern Rice & Bean Salad (THM E)

  • Servings: 8-10
  • Difficulty: Easy
  • Print


Credit: Erin Murray, My Fling with Food

Ingredients

  • 1/3 medium red onion, finely diced
  • 1/2 red bell pepper, diced
  • 1/2 orange bell pepper, diced
  • 1 small jalapeño, minced (seeds and ribs removed for a mild heat)
  • juice of 2 limes
  • 1 1/2 c cooked brown rice
  • 15oz can black beans, drained and rinsed
  • 15oz can kidney beans or pinto beans, drained and rinsed
  • 1 big handful of fresh chopped cilantro
  • salt and pepper

Directions

  1. Begin cooking the brown rice.
  2. Add the peppers and onion to the bottom of a large mixing bowl, and season with salt and pepper.
  3. When the rice is cooked and warm, add it on top of the vegetables and squeeze the lime juice over top. Give it a big toss.
  4. Add the drained and rinsed beans, cilantro, and a little more S&P then toss again.
  5. Serve at room temperature or chilled alongside any lean protein. Store in the fridge for up to one week.

Red, Wine, & Bleu Burgers (THM S)

Burgers are a staple in my household. Husband loves them. Kids love them. I love them! Plus, they are ridiculously easy to make.

PicsArt_06-02-05.49.11.png

This whole recipe (burgers plus a sauce topper) is less than 10 ingredients. Unbelievable, I know, but this recipe packs in the flavor with just a few ingredients.

I seasoned up 2lbs of ground beef sirloin with sliced scallions, salt-free all purpose seasoning, Worcestershire sauce, and dry sherry.

It probably sounds weird to “season” burgers with wine before cooking, but trust me the flavor is *amazing*. The sherry adds a beautiful depth of flavor while keeping the burgers nice and moist. I cooked my burgers to a strong medium (warm, pink center) and there was no trace of raw alcohol.

Mix the burgers with your hands until just combined, score with the side of your hand into sections (for even patties – I got about 7 big burgers out of this), and form into patties.

PicsArt_06-26-04.06.54

My best burger tip is to always make these slight dents in the center of your patties prior to cooking. The centers rise as they cook, so instead of them rising and you ending up with cylindrical burgers they rise to the height of the outsides, making it flat.

Before tossing your burgers onto the grill or sauté pan, season each one with a little extra salt and pepper on the outsides. This helps to ensure they’re seasoned well.

I cooked these burgers in a cast iron skillet for about 4-5 minutes on each side, turning only once.

While the burgers are cooking, make the bleu cheese sauce.

Place the sour cream into a small bowl with the bleu cheese crumbles, a few dashes of hot sauce, salt and pepper, and a touch of half and half or heavy cream to slightly thin the sour cream.

When the burgers are done, top each one with a generous helping of bleu cheese sauce. I served my burger alongside some fresh celery sticks and Trader Joe’s parsnip chips (which are seriously amazing, by the way. 1g of net carbs per serving and they’re a real chip!).

IMG_20170531_193244_464.jpg

You can serve the burgers atop lettuce (red or green leaf would be a great choice), or stuff it into half a Joseph’s pita. Either way, it’s delicious!

PicsArt_06-26-04.10.16

The burger itself really is incredible – the sherry keeps it moist while adding a slight red wine flavor and the dry seasoning adds a punch of different herbal notes (citrus, parsley, rosemary, etc.) with a little hint of onion from the scallions.

The bleu cheese sauce makes it rich and a little tangy from the cheese. [Really, I think beef and bleu cheese were put on this Earth to be best buds because they certainly rock together.]

These burgers would be perfect for a holiday party! With a burger this good, your guests will be knocking down your door for the recipe.


This post contains affiliate links, which means I receive a commission off of purchases made using these links. If you’re interested in fitness, the Trim Healthy Mama lifestyle, or just living a more healthy life, please consider using one or more of the links below. The money made helps me feed my growing family and keeps this blog running with free recipes. Thank you!

Red, Wine, & Bleu Burgers (THM S)

  • Servings: 4-6
  • Difficulty: Easy
  • Print


Credit: Erin Murray, My Fling with Food

Ingredients

    For the burgers:
  • 2lbs ground sirloin
  • 3 scallions, thinly sliced
  • 1 1/2 Tbsp salt-free all purpose seasoning
  • 2 tsp Worcestershire sauce
  • 1/2 c dry sherry, or other dry red wine
  • salt and pepper
  • For the bleu cheese sauce:
  • 1/4 c sour cream
  • 1/4 c bleu chesse crumbles
  • 4-6 dashes hot sauce
  • salt and pepper
  • half and half or heavy cream to thin slightly (about 1-2 Tbsp)

Directions

  1. Preheat a large skillet or grill over medium-high heat.
  2. Combine all ingredients for the burgers in a large bowl, and use your hands to incorporate everything together gently. Score the meat with the side of your hand into even secitons, then form patties. Make a slight dent in the center of your burgers for even cooking, then season the outsides with salt and pepper before cooking.
  3. Cook for about 4-5 minutes on each side, turning only once.
  4. While the burgers cook, prepare the bleu cheese sauce.
  5. Combine all ingredients for the bleu cheese sauce in a small bowl and set in the fridge until serving time.
  6. When the burgers are finished, top each one with a couple generous tablespoons of bleu cheese sauce. Enjoy as a lettuce burger, or stuff it into a Joseph's pita.

Low Carb Coffee Ice Cream (THM S)

Coffee lovers unite! This ice cream is all the creamy deliciousness of a warm morning cup of coffee in a chilly dessert version.

PicsArt_05-09-02.27.09.png

The first ice cream I ever loved (nay, “favorited”) was Haagen Dazs coffee ice cream. I am THE coffee gal and that ice cream felt like a big java hug, but in dessert form. Creamy and sweet, with a distinct coffee flavor – that is this ice cream. Except this ice cream is really good for you, and super easy to make.

My go-to ice cream base these days is a fat bomb – eggs, raw cacao butter, MCT oil, coconut oil, and heavy cream (or canned coconut milk, for dairy free). The result is this buttery soft ice cream, that absolutely melts in your mouth. For not a ton of milk, or cream rather, it’s almost unbelievable how creamy this stuff gets.

PicsArt_05-09-02.42.15

For the coffee part of it, I used instant espresso granules. You can use strongly brewed coffee as well, but you will have to use at least 1/2 a cup and reduce the cream which may make the texture of your ice cream more icy and hard. I liked the granules, because I only had to use 2 1/2 Tbsp for the whole batch, and I got a strong coffee flavor without diluting my creamy base.

The best part, is that there is absolutely zero cooking involved – just melting (microwaving, in my case) and throwing it in a blender. Easy, right?

PicsArt_05-09-02.39.56

If you need this base to be dairy free, you can add 1 cup of canned coconut milk instead of heavy cream. Just skip the phase where you add the ice cubes, and take it straight to your pre-chilled ice cream machine.

PicsArt_05-09-02.35.38

This ice cream is not only easy to make, it’s every bit as good (nay, BETTER) than top-shelf brands. Plus, you get multiple servings at your fingertips. It tastes sinful, but there’s no guilt in this dreamy java dessert.

This post contains affiliate links, which means I receive a commission off of purchases made using these links. If you’re interested in fitness, the Trim Healthy Mama lifestyle, or just living a more healthy life, please consider using one or more of the links below. The money made helps me feed my growing family and keeps this blog running with free recipes. Thank you!

Low Carb Coffee Ice Cream (THM S)

  • Servings: Multiple
  • Difficulty: Easy
  • Print


Credit: Erin Murray, My Fling with Food

Ingredients


Directions


1. Combine all ingredients, except for the ice cubes, into a high-powered blender and whip until creamy and slightly thickened.
2. Begin adding the ice cubes, one at a time, blending well for about 10 seconds between.
3. When the mixture is thick and slightly chilled, transfer it to your pre-frozen ice cream machine and churn according to manufacturer’s directions.
4. Transfer to a shallow, freezer-safe dish and freeze for at least one hour before serving.
*NOTE: If you’re using coconut milk for the dairy free version, SKIP the ice cube step and transfer the base straight to your ice cream machine.

Mediterranean Stuffed Mushrooms (THM FP/S)

This warm weather down in Georgia has me cooking up all of the fresh veggies and flavors of summer. These stuffed mushrooms are a tasty side for the family or an impressive appetizer for a whole party.

PicsArt_05-02-11.13.29

These stuffed mushrooms are so easy and flavorful, it’s going to blow your mind.

Start by mincing the tomato, shallot, garlic, and parsley. Season the vegetable mix with the juice of half a lemon, salt and pepper.

20170424060145_IMG_3164

For more of a FP side, add just 1 Tbsp of crumbled feta. For an S, add 2 Tbsp of feta.

Remove the stems of your mushrooms and place them cap-side down on a baking sheet.

20170424060154_IMG_3165

Fill each cap with about a teaspoon of filling. Some will be more or less, based on their size – just pack as much in there as you can, and fill them to the top of the cap.

20170424060935_IMG_3167

Bake at 350 for about 30 minutes. The mushrooms will be softened, but still able to hold their shape.

While they’re still hot, sprinkle with a little bit of parmesan and serve immediately.

PicsArt_05-02-11.15.14

The mushrooms are hearty, while the filling is delicate, zesty, and light.

These are perfect to go alongside some grilled protein, or as a fresh appetizer for a holiday party.

This post contains affiliate links, which means I receive a commission off of purchases made using these links. If you’re interested in fitness, the Trim Healthy Mama lifestyle, or just living a more healthy life, please consider using one or more of the links below. The money made helps me feed my growing family and keeps this blog running with free recipes. Thank you!

Mediterranean Stuffed Mushrooms (THM FP/S)

  • Servings: Multiple
  • Difficulty: Easy
  • Print


Credit: Erin Murray, My Fling with Food

Ingredients

  • 16oz whole cremini mushrooms
  • 1 Roma tomato, seeded and finely diced
  • 1 shallot, minced
  • 1 large clove garlic, minced
  • juice of 1/2 lemon
  • 1 1/2 Tbsp fresh parsley
  • 1-2 Tbsp crumbled feta* (See Notes)
  • salt and pepper
  • Optional garnish: more fresh parsley, grated parmesan

Directions

  1. Preheat oven to 350.
  2. In a small bowl, combine the tomatoes, shallot, garlic, parsley, lemon, and feta. Season with salt and pepper.
  3. Gently remove the stems from each mushroom, and place them cap-side down on a large baking sheet.
  4. Fill each cap with about a teaspoon of filling. Fill each cap to the brim, as the mushrooms and filling will cook down slightly.
  5. Bake at 350 for about 30 minutes. The mushrooms should be softened, but still able to hold their shape.
  6. While they’re still warm, sprinkle with Parmesan, if using. Serve immediately.
  7. *NOTES: For a FP, use just 1 Tbsp of feta. For an S, use 2 Tbsp.

Crockpot Mexican Shredded Beef (THM S)

If you can believe it, this was my first time EVER making a beef roast. Trust me when I say this shredded beef is easy, flavorful, and versatile!

PicsArt_04-30-02.57.37

I love using my Crock Pot for various reasons, but overall it makes dinner insanely easy and it cooks without heating up the kitchen. Between preschool drop off, working, and getting my daughter to and from karate (right before dinner, no less) dropping something in the crock pot is definitely the easiest part of my day. The best part is coming home to a fully cooked dinner!

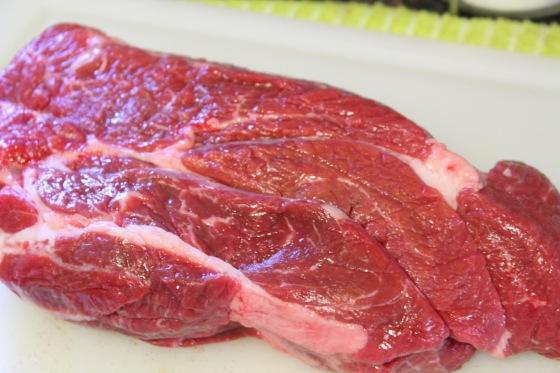
Let’s get to the nitty gritty of the recipe – start with a 2.5 – 3lb boneless beef roast.

20170424220951_IMG_3205

Next, throw the dry spices together in a small bowl: chili powder, cumin, ground coriander, smoked paprika, cayenne, oregano, salt and pepper. Stir them up, activating the spices by rubbing them gently between your fingers.

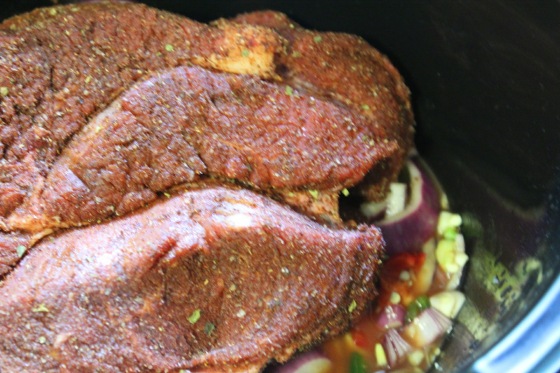
Season the whole roast on both sides, massaging the spices into the meat.

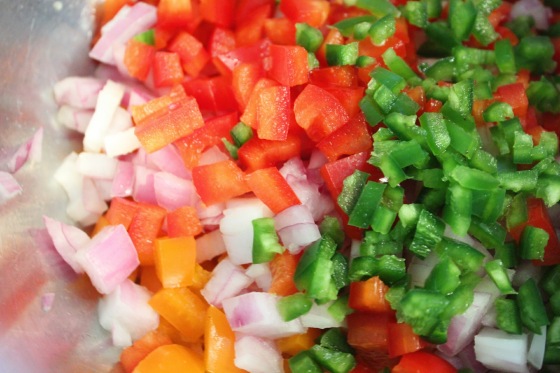
Into the bottom of your crock pot, stir together the broth (any variety is fine), lime juice, tomato paste, onion, garlic, jalapeño, and Fresno chili. Fresno chilis look like red jalapeños and are similarly flavored. You could also use another jalapeño, Serrano pepper, Anaheim pepper, or a different pepper of similar heat level.

For the peppers, you can remove the ribs and seeds or leave them. I seeded half of my peppers, and the beef remained moderately spicy. I sliced everything straight across, because the crock will cook everything down to falling apart texture and tiny cuts aren’t needed.

Lay the seasoned beef roast on top of the veggies, place the lid, and set it on low.

20170424221431_IMG_3213

Let it go low and slow for 8-10 hours until it’s falling apart.

PicsArt_04-30-02.59.51

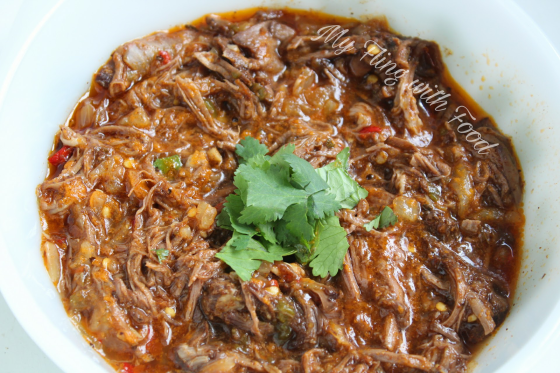
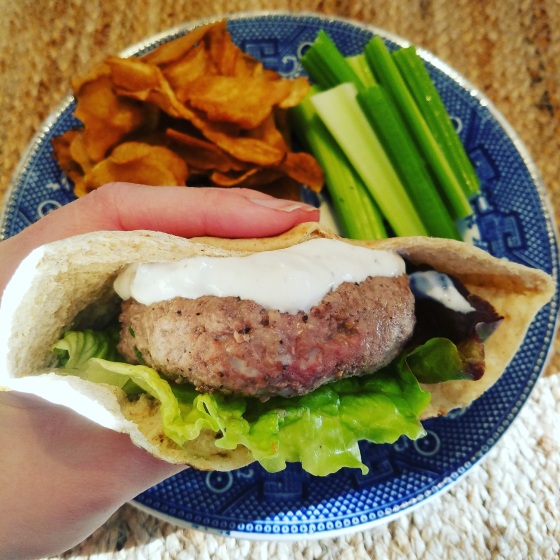
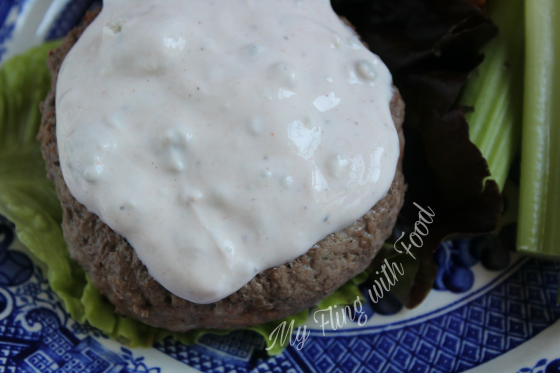
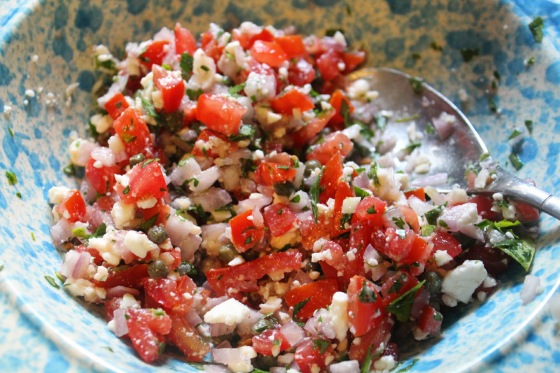
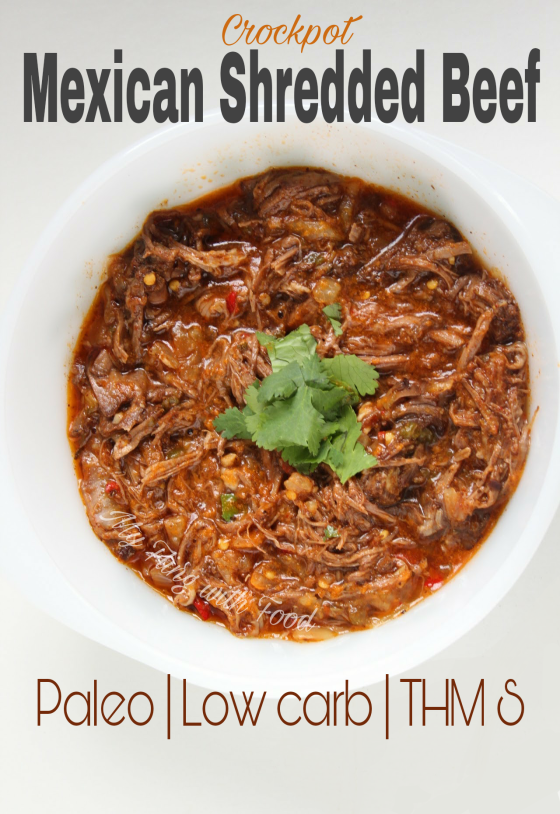
After it’s done cooking, shred the roast between two forks. I say shred, but really that roast cooks up so tender that you could touch it with a fork and it just falls apart. Serve it right up, any way you like it. I put it over a big bowl of greens with some salsa, avocado, and fresh cilantro with a low carb tortilla on the side. My family enjoyed the beef as tacos with sliced avocados.

20170425073019_IMG_3224

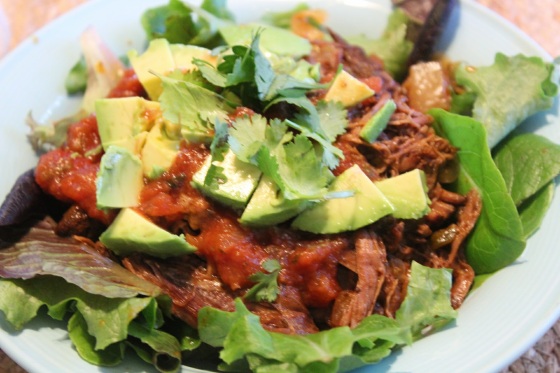
The beef is incredibly soft and tender. You get a hint of lime juice and a little smoky, spicy kick from the spices and peppers. All in all, it’s the perfect, casual way to enjoy a roast.

The leftovers could be used for salads or burritos later in the week. You could even throw them into a breakfast hash, because WHY NOT.

This post contains affiliate links, which means I receive a commission off of purchases made using these links. If you’re interested in fitness, the Trim Healthy Mama lifestyle, or just living a more healthy life, please consider using one or more of the links below. The money made helps me feed my growing family and keeps this blog running with free recipes. Thank you!

Crock Pot Mexican Shredded Beef (THM S)

  • Servings: 4-6
  • Difficulty: Easy
  • Print


Credit: Erin Murray, My Fling with Food

Ingredients

  • 2-3lb boneless beef roast
  • 1 medium red onion, sliced
  • 1 jalapeño pepper, (seeded or not) sliced
  • 1 Fresno pepper, (seeded or not) sliced
  • 2 garlic cloves, minced
  • 1/4 c broth (any variety, I used chicken)
  • juice of 2 limes
  • 3 Tbsp tomato paste
  • 1 1/2 Tbsp chili powder
  • 2 tsp ground cumin
  • 1 tsp ground coriander
  • 2 tsp smoked paprika
  • 1/8 tsp ground cayenne
  • 1/2 tsp dried oregano
  • salt and pepper
  • Toppings of choice: avocado, salsa, sour cream, fresh cilantro, cheese, etc.

Directions

  1. Combine the dry spice mixture in a small bowl, grinding it lightly between your fingers to activate the spices.
  2. Season the beef with the entire spice mixture, massaging it all over the meat.
  3. In the bottom of your crock pot, combine the tomato paste, broth, lime juice, onions, peppers, and garlic.
  4. Lay the beef roast on top of the veggie mixture, cover, and set on low for 8-10 hours.
  5. After 8-10 hours, shred the meat between two forks and serve immediately.

Vanilla Bean Fat Bomb Ice Cream (THM S)

Call me crazy, but vanilla bean is probably the best flavor of ice cream there is. Yep, I said it! It’s the backbone of many tasty desserts: ice cream cake, shakes, floats, sundaes, and it’s the essential topper for warm baked goods.

This no-cook ice cream is the quickest, easiest ice cream you’ll ever make!

PicsArt_04-29-02.11.37

This ice cream base is my absolute favorite [mostly because I can make it in my blender without the whole headache of making and cooling a custard], and it’s unbelievably creamy.

The base consists of good-for-you-fats like MCT oil, coconut oil, eggs, and raw cacao butter. I also use heavy cream in the base, but you could make it dairy free by using unsweetened vanilla almond milk or canned full fat coconut milk (if you opt for coconut milk, skip the step of adding ice cubes and just add it straight to your ice cream machine.)

Simply whip together all the ingredients except for the ice cubes in a high-speed blender until creamy and slightly thickened. Begin adding the ice cubes one at a time, blending well for about 10 seconds between.

Transfer the mixture into your pre-chilled ice cream machine and churn for approximately 15 minutes, or until it reaches soft serve consistency.

Place the ice cream into a long, shallow freezer-proof dish, cover, and freeze for at least 1 hour before serving.

PicsArt_04-29-02.15.36

Perfectly soft and creamy ice cream with gorgeous flecks of vanilla bean throughout. [Can you tell that I’m a lover of ice cream?]

This base is my favorite because it doesn’t become a rock in the freezer – it’s like grocery store ice cream texture, scoopable straight out of the freezer.

PicsArt_04-29-02.18.13

If you’re feeling like some extra decadence, go ahead and top that beautiful ice cream with some of my easy 5-Minute Hot Fudge [spoiler alert – it tastes like a liquid brownie. SO. GOOD.].

PicsArt_04-29-07.16.20

This post contains affiliate links, which means I receive a commission off of purchases made using these links. If you’re interested in fitness, the Trim Healthy Mama lifestyle, or just living a more healthy life, please consider using one or more of the links below. The money made helps me feed my growing family and keeps this blog running with free recipes. Thank you!

Vanilla Bean Fat Bomb Ice Cream (THM S)

  • Servings: Multiple
  • Difficulty: Easy
  • Print


Credit: Erin Murray, My Fling with Food

Ingredients


Directions

  1. Combine all ingredients, except for the ice cubes, into a high-powered blender and whip until creamy and slightly thickened.
  2. Begin adding the ice cubes, one at a time, blending well for about 10 seconds between.
  3. When the mixture is thick and slightly chilled, transfer it to your pre-frozen ice cream machine and churn according to manufacturer’s directions.
  4. Transfer to a shallow, freezer-safe dish and freeze for at least one hour before serving.
  5. *NOTE: If you’re using coconut milk for the dairy free version, SKIP the ice cube step and transfer the base straight to your ice cream machine.

Save

Gluten Free Strawberry Cupcakes (THM S)

These strawberry cupcakes are not only fresh and tasty, but so easy to make!

PicsArt_04-25-10.02.00

These cupcakes are a celebration of the beautiful, fresh strawberries of Spring. They’re popping up by the gallon at our local farmer’s markets in Georgia already, and I just can’t resist them.

For the batter and frosting, you’ll need to make a batch of my Strawberry Sauce. It helps preserve your fresh berries while readying them for different recipes: baked goods, pies, syrups, or pour it over ice cream.

For the cupcakes, combine the dry ingredients in a medium bowl: almond flour, Pyure or THM Gentle Sweet, baking soda, baking powder, and salt. In a separate bowl, combine the wet ingredients: coconut oil, eggs, vanilla, strawberry sauce, lemon zest and juice.

Whisk the wet into the dry mixture until just combined. For a deeper pink color, you can add food coloring if you like. I liked the natural look, so mine are pictured with no additional coloring.

Scoop the mixture into a lined cupcake pan [I love using an ice cream scoop for this! Makes the portions even, and one scoop is the perfect amount of batter.]

20170405061707_IMG_3035

Bake the cupcakes in a 350 degree oven for about 25 minutes or until lightly browned and fully set in the middle.

20170405064512_IMG_3037

Allow the cupcakes to cool completely while you make the frosting.

For the strawberry frosting, combine the softened cream cheese, butter, Pyure or THM Gentle Sweet, and vanilla in a medium bowl. Once the mixture is slightly fluffy, add the strawberry sauce and whip until fully incorporated.

Transfer the frosting to a piping bag fitted with a tip, and pipe some onto each cupcake.

PicsArt_04-25-10.07.45

These cupcakes are moist with the lightly sweet and tart flavor of fresh strawberries. The frosting is the perfect creamy complement to these delicate cupcakes.

PicsArt_04-25-10.05.20

My kiddos enjoyed these very much [probably because I let them have cupcakes for breakfast a few times ^_~]. Adults will love them too!

This post contains affiliate links, which means I receive a commission off of purchases made using these links. If you’re interested in fitness, the Trim Healthy Mama lifestyle, or just living a more healthy life, please consider using one or more of the links below. The money made helps me feed my growing family and keeps this blog running with free recipes. Thank you!

Gluten Free Strawberry Cupcakes (THM S)

  • Servings: Makes 12-15
  • Difficulty: Easy
  • Print


Credit: Erin Murray, My Fling with Food

Ingredients

    For the Cupcakes:
  • 2 1/2 c almond flour
  • 1/3 c Pyure or THM Gentle Sweet
  • 3/4 tsp baking soda
  • 1/2 tsp baking powder
  • 1/4 tsp salt
  • 1/3 coconut oil, melted
  • 4 eggs
  • zest of 1 lemon
  • juice of 1/2 lemon
  • 2 tsp vanilla
  • 3/4 c Strawberry Sauce
  • For the Strawberry Frosting:
  • 2 8-oz packages cream cheese, softened
  • 1 stick unsalted butter, softened
  • 1 tsp vanilla
  • 1-2 Tbsp Pyure or THM Gentle Sweet
  • 1/3 c Strawberry Sauce

Directions

  1. Preheat oven to 350.
  2. For the cupcakes, combine the dry ingredients in a medium bowl. In a separate bowl, whisk together the wet ingredients.
  3. Whisk the wet into the dry ingredients until fully incorporated.
  4. Scoop the batter into a lined cupcake pan.
  5. Bake at 350 for about 25 minutes, until lightly browned and fully set in the middle. Cool completely while you make the frosting.
  6. Combine all ingredients for the frosting except the strawberry sauce and whip with a hand mixer until light and fluffy.
  7. Add in the strawberry sauce, and beat again until fluffy.
  8. Pipe or spread the frosting even onto each cupcake. Serve immediately or refrigerate if making more than 24 hours ahead of serving.


2-Ingredient Everything Bagel Dip (THM FP)

This post contains affiliate links, which means I receive a commission off of purchases made using these links. If you’re interested in fitness, the Trim Healthy Mama lifestyle, or just living a more healthy life, please consider using one or more of the links below. The money made helps me feed my growing family and keeps this blog running with free recipes. Thank you!

You will not believe how ridiculously easy (and tasty) this dip is!

PicsArt_04-25-11.49.27

During my latest trip to Trader Joe’s, they were displaying the Everything Bagel seasoning along with some other seasonal items, and it jumped out at me. The ingredients are very straightforward: onion, garlic, seasame seeds, salt, and poppyseeds. I had some reduced fat sour cream sitting in my fridge at home waiting for a purpose, and *click* purpose found.

20170422011538_IMG_3153

Can a dip really be this easy? YEP.

Mix an entire 16oz container of reduced fat sour cream with about 3 Tablespoons of the Everything Bagel seasoning. If you want to add a little freshness to it, add a fresh herb of your choice: parsley, chives, dill, or scallions. Chop up a few tablespoons, toss it in with your dip and some salt and pepper. That’s it!

Leave it in the fridge for about an hour for the salt crystals to break down and all the flavors have a chance to combine.

PicsArt_04-25-11.59.05

This dip is a THM FP up to about 3 Tablespoons (which would be 4.5g of fat). If you’re enjoying this with an E meal, be sure to watch the other fats in your meal to keep within the limits. There were no carbs in my reduced fat sour cream, so if you’re in S mode you can pile on as much as you like (yay!).

Serve with your favorite crudités: zucchini sticks, celery, cucumbers, grape tomatoes, broccoli, cauliflower, mini sweet peppers, Parmesan Whisps or other cheese crackers.

Throw this together before a party or brunch get together, and all your guests will rave! Or, you know, just throw it together for yourself and you’ll have your own little rave. ^_^

Everything Bagel Dip (THM FP)

  • Servings: Makes 16oz of dip
  • Difficulty: Easy
  • Print


Credit: Erin Murray, My Fling with Food

Ingredients

  • 1 16oz container of reduced fat sour cream (mine had 3g of fat per 2 Tbsp, good for S or E)
  • 3 Tbsp Everything Bagel seasoning
  • optional, fresh herb of choice: chives, scallions, parsley, dill, etc.
  • salt and pepper

Directions

  1. Combine all ingredients in a small bowl and refrigerate for one hour before serving.